惠普暗影精灵8 Pro 锐龙版笔记本重装win7系统教程
来源:知识教程 /
时间: 2024-12-13
暗影精灵8 Pro锐龙版是一款相当有意思的“A+A”游戏本,这款笔记本还采用了锐龙7 6800H和Radeon RX 6650M的强劲组合,可以在1080P高画质下畅玩市面上99.9%的游戏,这就使得很多的用户们都十分的喜爱这款笔记本,但是也有不少的用户们想安装win7系统,那么要怎么安装?下面就让本站来为用户们来仔细的介绍一下惠普暗影精灵8 Pro 锐龙版笔记本重装win7系统教程吧。
惠普暗影精灵8 Pro 锐龙版笔记本重装win7系统教程
安装方法
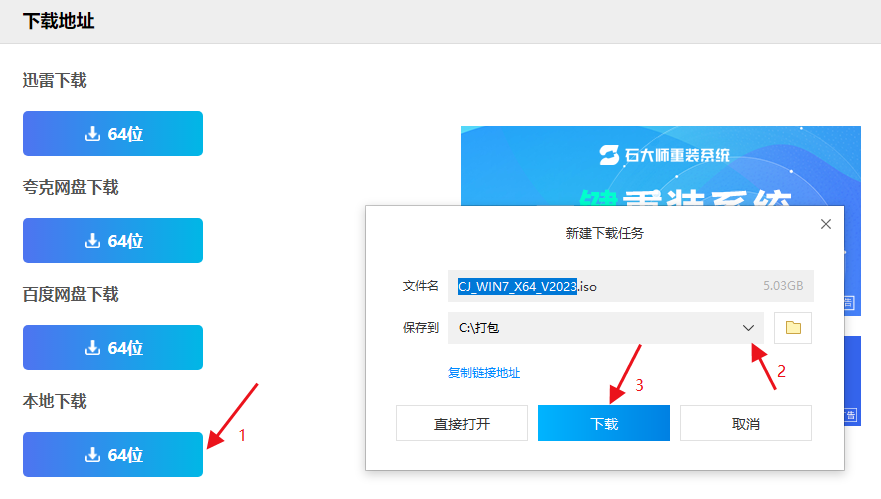
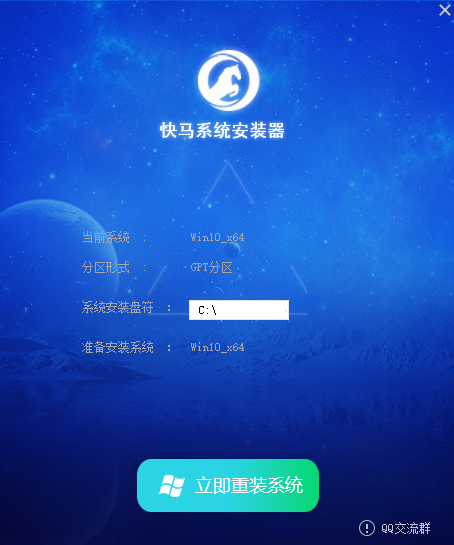
1、点击本地下载(纯净之家提供迅雷、网盘、本地下载三种下载方式,选择其中一种进行下载)。
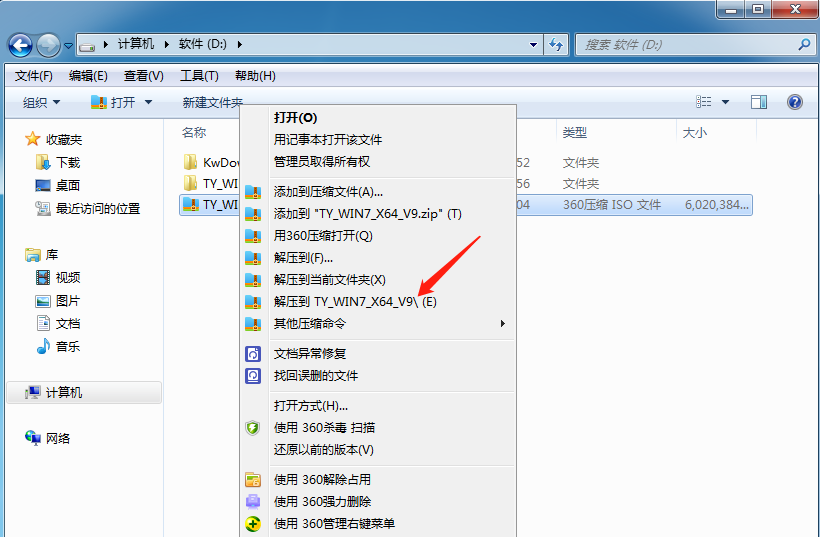
2、解压下载好的系统镜像文件(注意:不可存放在C盘及桌面,否则会导致安装失败),关闭杀毒软件。
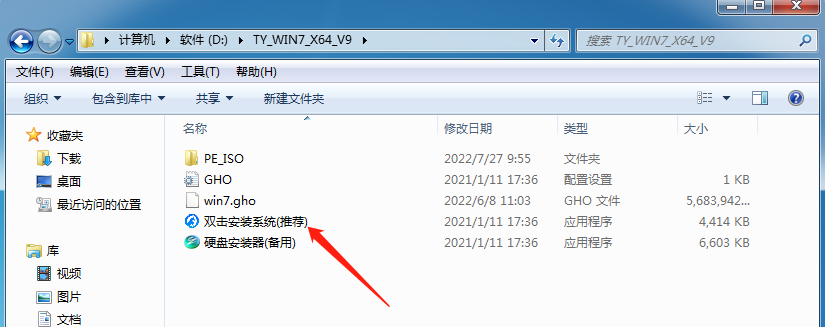
3、打开解压后的系统镜像文件夹,点击“双击安装系统(推荐)”。(推荐安装器如果无法使用可以使用备用安装器)
安装Win7需要确保磁盘的分区形式为MBR格式,否则系统将安装失败。
系统重装需格式掉系统盘及桌面的资料需备份的请提前备份,以免造成不必要的损失。
4、点击“立即重装系统”。
5、电脑自动重启进入系统重装进程,无需进行任何操作。
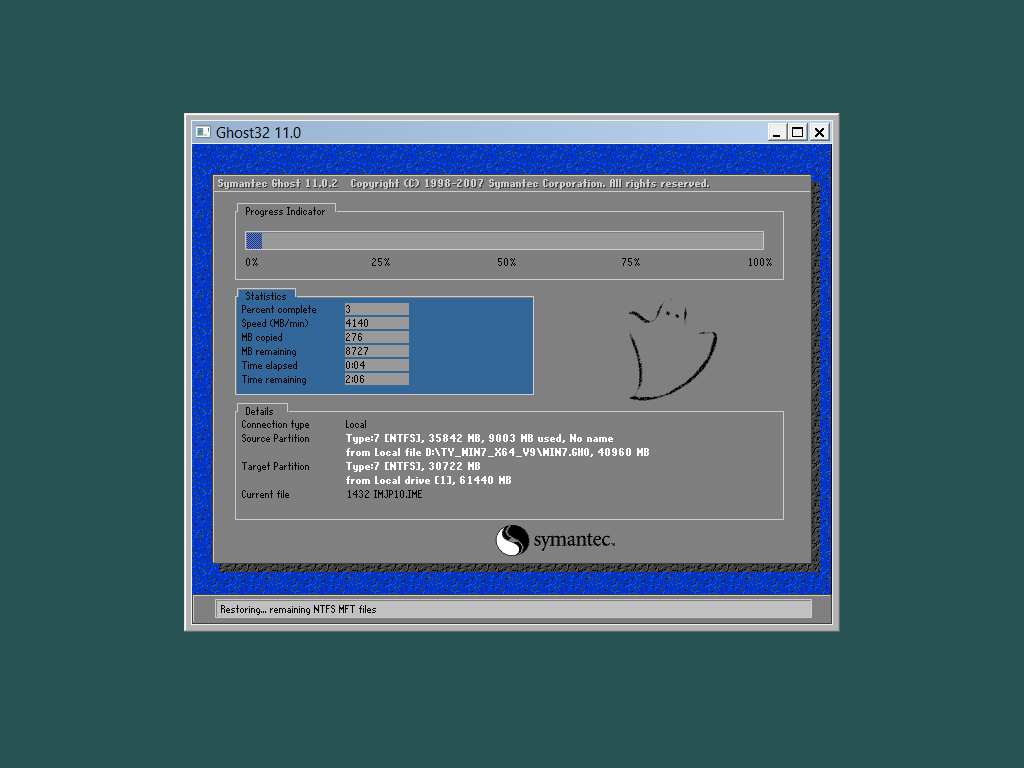
6、自动安装系统程序及必要驱动组件中。
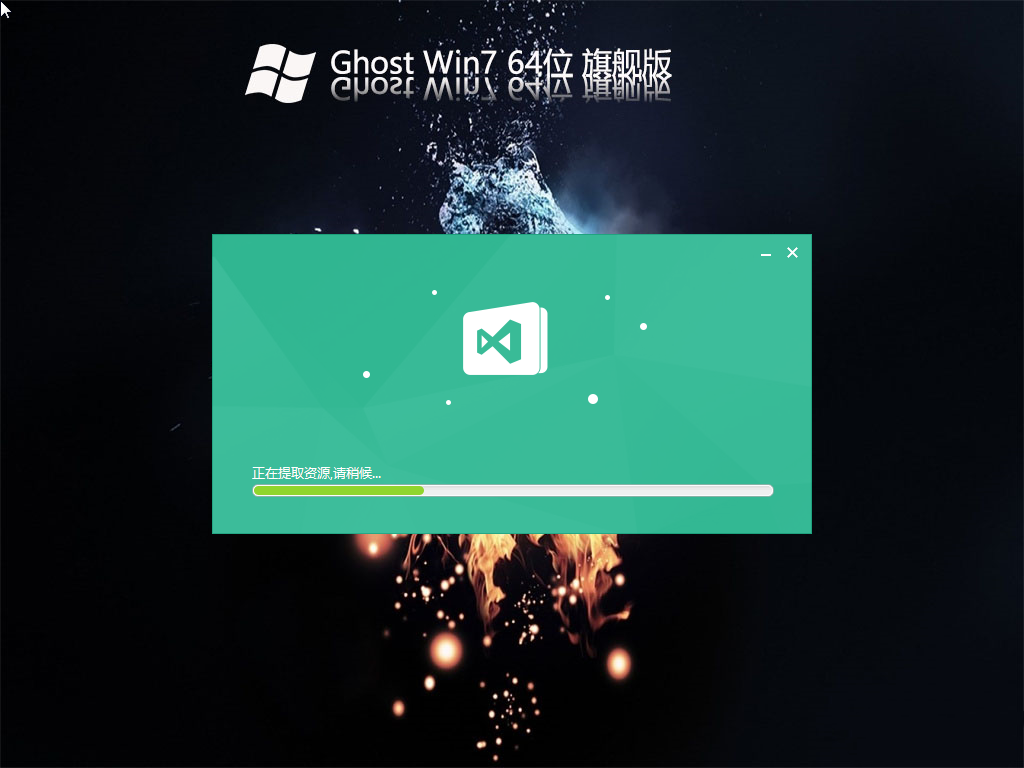
7、安装完成,整个过程只需要5-30分钟,配置越高的电脑安装速度越快。