PhotoShop如何给图片打马赛克?PhotoShop给图片打马赛克方法
来源:知识教程 /
时间: 2024-12-13
当我们将一些图片发布出来时,图片中可能存在一些比较隐私和重要的内容不想别人看到,因此想要给图片打上马赛克,那么在PhotoShop中怎么给图片打马赛克呢?本篇教程就来介绍一下PhotoShop给图片打马赛克的操作方法,感兴趣的小伙伴一起来看看吧。
操作方法
1、首先我们将需要设置的图片在PhotoShop中打开。

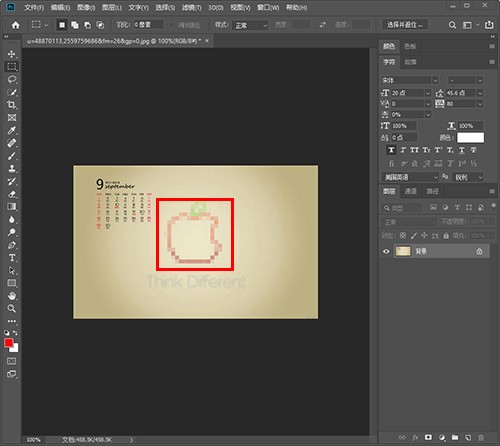
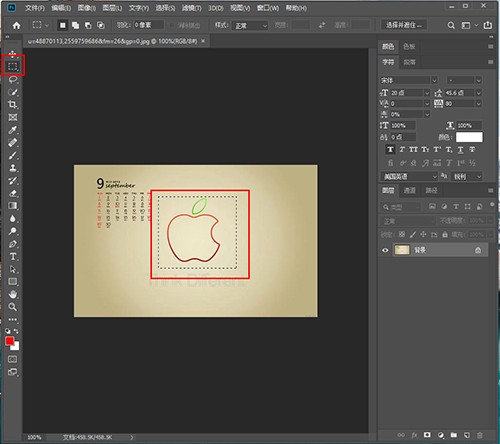
2、接着选择【矩形选择工具】将图片中需要打马赛克的部位选择出来。
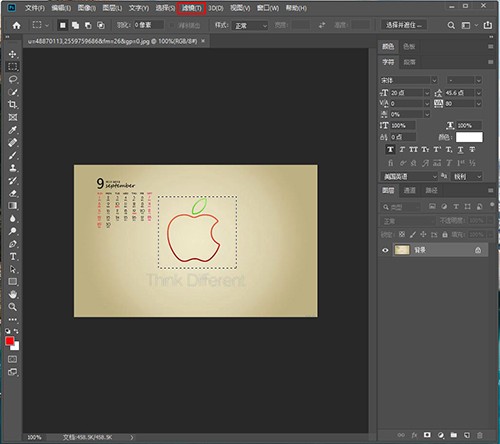
3、选择好后点击上方的【滤镜】选项卡。
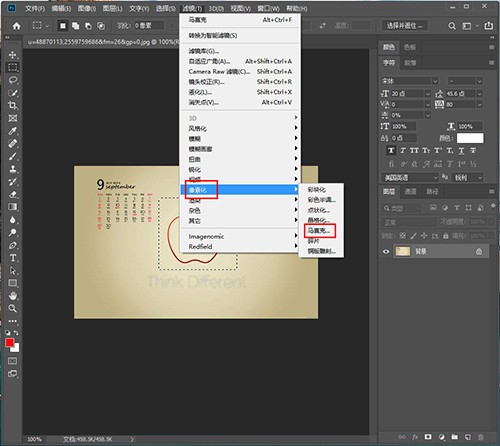
4、然后在滤镜下拉框中选择【像素化】,并在二级菜单中找到【马赛克】选项点击。
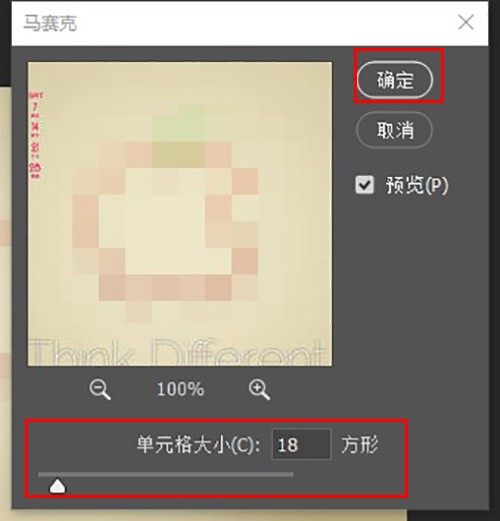
5、在弹出的窗口中设置需要调节的【单元格大小】,然后点击【确定】。
6、最后可以看到界面中选择的区域已经打上了马赛克,这时取消选择就可以了。